Recently, Windows users often encounter incorrect operation of the hard drive. Excessive load is the most popular reason. The system slows down, and the task manager shows the disk load at 100%.
In order to understand what is causing the load on the hard drive, you need to rank processes according to the degree of influence on the system and determine which of them is the most resource-intensive.
To do this, in the task manager itself, you need to click on Disk until the arrow points down.
After this, you can see which process uses disk resources more than others and may be the reason for the incorrect operation of the hard drive.
There are many processes that can cause this problem.
And to correct this, you can use different methods. Let's look at the most common ones.
To do this, we will divide them into groups and study each separately.
- Windows internal services failure
- Disk problems
- Malware
Windows internal services have failed.
Windows Services manage all processes in the operating system. These are services that can start automatically when you turn on the computer; they also ensure the operation of third-party programs. Since a specific service is responsible for the operation of a particular application, if it does not work correctly, the system may begin to malfunction. Incorrect operation of services such as SuperFetch, Windows Search, Windows Update service and Backup service are the most common reasons for hard drive load.
Let's look at what these services are, where they are located and how they can be turned off.
Before disabling certain services, be sure to familiarize yourself with what this service is responsible for and what the consequences will be if you disable it.
Superfetch.
The SuperFetch service identifies which programs are launched most often, marks them as frequently used, and loads them into virtual memory in advance. Thus, this service periodically accesses disk resources and can cause it to load.
In order to disable it you need to:
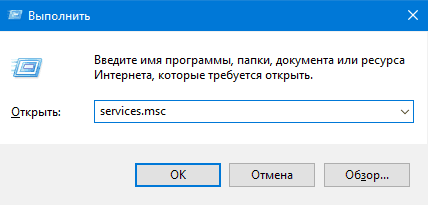
- Using a keyboard shortcut Win+R open the window Execute, there we enter services.msc
 In the list of services that opens, you can see which services are currently active and you can read their description.
 - Find in this list SuperFetch, right-click on it and go to Properties.

- Then in the line State first press Stop, and to completely disable it in Launch type choose Disabled.

Windows Search.
Windows Search is a service that allows system users to quickly find the documents and files they need. To do this, it periodically performs a background scan of the contents of the user's computer. For quick searching, the service uses a file indexing system, which also makes it possible to load the hard drive to its maximum capacity.
In order to disable it, you need to follow the same procedure as with disabling the Superfetch service.

Windows Update Service.
The Windows Update service allows developers to improve an existing system - increase security, optimize processes, and add new functions. Due to the fact that the Windows operating system places a high priority on the operation of this service, during the system update process, other programs are allocated fewer resources and they may slow down their work. But if you need resource-intensive programs for your work, then using them in parallel with the active update process can cause maximum use of disk resources.
To ensure that the update process does not interfere with the daily use of your computer, you can manually check for updates. It is strongly not recommended to completely disable updates for security reasons.
- To do this, we also use the familiar window with a list of services, only this time we find the service Windows Update.

- And we assign it to her Startup type - Manually.

- Now, the next time you need to check for updates, you can simply click on the icon Checking for updates V Cupdate center.
 And if they are found, install them at the appropriate time.
Backup service.
The backup service is an operating system application. Using archiving tools, creates backup copies of user information. This is necessary to restore the system if a critical error or virus infection occurs. Backup is a very resource-intensive process and can also cause significant disk usage.
In order to change the parameters of this service and make it work when it does not cause us any inconvenience, we need to do the following:
- From parameters Windows Updates and Security need to go to Windows Activation Service and then to the section Backup and recovery

- Then go to Nbackup settings

- Select the archiving location where the backup will be saved and check the box Pgive me a choice

- Select which specific sections need to be archived and, before clicking the button Save settings and start archiving, set a suitable schedule for this process.

If you can see in the task manager that another service caused 100% loading of Windows, then, by analogy, through the list of services, you can disable any of them. But you need to understand that this is a temporary solution, and if you may need this service in the future for work, you need to analyze in more detail why it is failing and restore the normal functioning of the system.
In some cases, to completely disable services and make changes to the system, you need to restart the computer.
Disk problems
The reason why the hard drive takes a long time to load in idle mode may be the computer's hardware, or problems due to its interaction with other system components. The most common reasons are the following: physical damage to the hard drive, a conflict or lack of drivers for the hard drive to work with Windows, and high disk fragmentation.
Physical damage to the hard drive
When physical defects appear, the performance of the drive is greatly reduced. The hard drive can no longer process the data the system gives it at the same speed. Because of this, the load on the disk increases greatly.
To check the disk you can use the built-in command chkdsk.exe.

We are interested in the line - quantity KB in bad sectors. If the value is different from 0, then you need to start the recovery process, either using the same command or using third-party applications such as Victoria, MHDD.
If restoring damaged sectors does not help, then you need to replace the hard drive.
Lack of drivers
Many users who reinstall Windows on their own usually do not pay attention to installing SATA AHCI drivers. In most cases, the driver built into Windows is enough for the disk to work correctly. But, if after disabling services, the problem with disk loading and slow system operation continues, try installing or updating this driver.
In order to check the presence of a SATA AHCI driver, you need to look at its name in Device Manager
We also go to Execute and use the command devmgmt.msc
Name - " Standard SATA AHCI controller"indicates that the system has a built-in Windows driver installed. In order to install the required original driver, visit the hardware manufacturer’s website and download it from there.
The official driver from the manufacturer should ensure correct operation of the hard drive with the system.
Updating your computer configuration
Updating the computer configuration sometimes also causes the hard drive to not work correctly. This is especially true when purchasing new media.
In this situation, if installing drivers did not solve the problem. You can try flashing Bios to a newer version or resetting its settings.
Hard drive fragmentation.
Fragmentation is the process of logically dividing files. With fragmentation, a new file that needs to be written to the system is partly written in the place of already deleted files and partly in a new place. If the system is highly fragmented, it needs more time to collect information and work with it, and the disk load increases accordingly.
In order to reduce fragmentation, defragmentation is used. A process in which parts of a split file are moved so that they fit adjacent areas on the disk.
To start defragmentation you need to go to Properties local disk, in the tab Service choose Optimization
Heavy use of the paging file
The operating system begins to actively use the page file when it experiences a lack of physical RAM. Windows partially places in it programs and services that are open in the background but are not being used right now. Such active work with the swap file can seriously load the hard drive.
You can see how loaded the paging file is using standard Windows tools. By using Task Manager let's go to Resource Monitor, then click on the “ Memory", here you can see how much the swap file is currently being used. 
If this indicator is constantly at a high level, you need to stop the resource-intensive application to unload the page file. Or, if you need to use more RAM for work, the best solution would be to purchase additional memory kits. This will relieve the disk load when accessing the paging file.
Running resource-intensive applications
The use of resource-intensive programs such as Torrent or applications for synchronizing with cloud services can place a heavy load on the hard drive while it is actively running.
You can also find out which program is placing a heavy load on your hard drive using Task Manager.
In this example, you can clearly see how downloading and distributing torrent files puts a strain on the hard drive. The same result will occur when the application on the desktop is synchronized with the cloud. The examples can be listed for a long time, but the principle of operation is the same.
Here the recommendations may be as follows.
During active work with the computer, when large system resources are needed, disable all unnecessary applications. It is better to continue downloading, distributing torrents and synchronizing when the computer is used in multimedia mode.
Malware
The actions of malware can also cause maximum load on the hard drive. Recently, in addition to classic viruses, infection methods aimed at unauthorized mining have become very popular. Mining viruses are directly aimed at using system resources to mine cryptocurrency.
See a separate article about newfangled ones and ways to combat them.
This process can be determined in the same way - through Task Manager. If the number one impact on the disk is a process with an unknown name, which the user did not launch on his own, and after trying to terminate it manually, the system crashes, it may be a virus.
In this case, it is necessary to scan your computer with anti-virus solutions with current anti-virus databases in order to more accurately determine the latest developments of malware.
Friends, we have looked at the most popular reasons for loading a disk at 100%. If you know other methods to solve this problem, share in the comments.
One of the most difficult issues to resolve with Windows 10/8.1 is when it suddenly stops responding or responds slowly. There can be many reasons, but the most common one is when the disk is loaded at 100 percent in the task manager. Many people began to pay attention to the persistent workload of the hard drive after updating Windows 7 to 8.1 and 10.
In this guide, we will look step by step at various solutions to fix this problem after studying and implementing the methods described by others, as well as our own experiments. Many forums and sites mention methods such as disabling superfetch, prefetch and service bits, but I will not recommend the same. I mean, you can actually disable it to solve the 100% hard drive usage issue.
Ways to solve when the disk is 100 percent loaded in Windows 10/8.1
1. Updating windows can lead to high hard drive load. Just close all programs and wait for Windows to install updates, then restart your computer.
2. Using the Control Panel, remove all browsers except EDGE and Internet Explorer. This isolates the problem with plugins (browser extensions). Another suggestion is to remove the plugins one by one from each browser and check. Adobe Flash and Shockwave player are common culprits of hard drive load.. Knowing the fact that browsers can be re-installed in a matter of seconds, then delete the "TEMP" folder by typing in Explorer (my computer) %Temp%. Empty folder Prefetch(preload files) along the path C:\Windows. If the folders are not completely cleared, then I recommend that they be completely cleared. Reboot the system and wait 12 minutes; if the problem is resolved, you can reinstall the deleted browsers.
3. It's worth considering the impact of diagnostic tracking in Windows 10. Many users blame the service DiagTrack at 100% hard disk load. If you see this in the task manager in the disk load usage, then disable it. Run command line as administrator and enter the commands there one after another:
sc config "DiagTrack" start= disabled
sc stop "DiagTrack"

4.
Run Command Prompt as Administrator. Type in search, near start, cmd and right-click run as administrator. In CMD enter the following command chkdsk. This command will fix errors on your hard drives. 
If this does not help, then we will run this procedure with enhanced functions. Type the following command and press Enter:
chkdsk.exe /f /r
- /F corrects detected errors.
- /R identifies bad sectors and tries to recover information.
5. Open and disable cloud protection and look at disk loading.
6. Windows Search Indexer is one process that could be the culprit behind your 100 percent disk utilization problem. If you don't use Windows search, you can check if the problem is resolved.
7. Disable Print Manager, which in turn works for all users at once. Press the keyboard shortcut Win+R and enter services.msc. Your printer will stop working after this. But at least you can check if this is the reason or not. If the reason is this point, then try connecting another printer or update the drivers.

8. The setting will help you reduce the load on your hard drive.
9. Update your drivers to the latest versions.
10. Open a command prompt and type sfc /scannow to check the integrity of system files.

11. Open a Command Prompt, type the following command and press Enter to run the Performance Troubleshooter.

12. Virtual memory is a combination of RAM and hard drive space and can be the reason your hard drive is being overused. If there is not enough RAM to complete a task, the hard drive is used to supplement the RAM. The data moved to the hard drive is then returned to RAM. Try setting up the swap file and playing with the size. Set the paging file to 1.5 times larger than your installed RAM on your computer and check, if it doesn’t help, then see more.
13. If all else fails, then you can reset windows. You can do this to come back later.

14. Standard power modes are more susceptible to 100% disk usage, but switching to high performance often solves the problem. Click Win + X and select " Power management", then click on " Additional power options" and turn on " ".

15 . The disk may be 100 percent loaded due to scheduled defragmentation. Type "windows" in search task Manager" and run the application. Disable all scheduled disk defragmentation tasks.
16. Otherwise, if Task Manager shows 100% disk usage on Windows 10 devices with Interrupt Mode and Signal Message (MSI) enabled, see: in the support article .
Advice: Hard drive wear and tear is the main culprit behind freezing and booting at 100%. If your drive is already 7 years old, then most likely it will have to be replaced. SSD drive is very popular these days, replace it instead of your HDD hard drive. An increase in speed is guaranteed.
The disk is constantly working, judging by the continuous glow of the indicator on the front panel of the computer, and in the task manager we see that the disk utilization is 100%. All programs launch slowly and you cannot determine what is loading your computer so much.
Excessive disk load is very common immediately after reinstalling the system. Services are launched that sort the data, index it, and optimize the disk. Unfortunately, sometimes the load is so high that it is impossible to use the computer. We offer several ways to cope with this problem.
Automatic disk defragmentation starts at some time and optimizes the hard drive. This process can significantly slow down your computer.
To turn off automatic disk defragmentation, go to the Windows 8 Start screen or the Windows 7 Start menu and type “defragmentation” in the search bar. The “Defragment and optimize your disks” feature should appear in the search results.
Click on the found entry. The disk optimization window will open. Click on “Customize schedule” in Windows 7 or “Change settings” in Windows 8.

In the window that opens, disable the “Run on a schedule (recommended)” option. If you disable this option, the system will not defragment without our knowledge and consent.

Disable file indexing
File indexing is probably the biggest drain on disk performance right after a system reinstall. What is indexing? The system scans the disk, building and putting in order a database of all files that are located in their partitions. Thanks to this, subsequent searches for files using a search engine are much faster.
Unfortunately, the indexing process itself can take a very long time and at the same time slow down the computer. Fortunately, it can be easily disabled. To do this, press the Win + R key combination. The “Run” window will open - enter the command in it services.msc and confirm its execution with Enter.

In the list of services on the right side you need to find the Windows Search service. Double-click on it and in the window that opens, click on “Stop”. Then set the “Startup Type” field to “Disabled”. Thanks to this, file indexing will not be enabled automatically.

Disable preloading of data into RAM (Prefetcher)
Preloading data into RAM is another system service whose purpose is to speed up the operating system and reduce program loading times, but in many cases it works the other way around.
To disable it, press the Win + R key combination. In the Run window that opens, enter the regedit command to enter the Windows Registry Editor.
In the editor, go to the following parameter:
"HKEY_LOCAL_MACHINE > System > CurrentControlset > Control > Session Manager > Memory Management >.

Click on the PrefetchParameters parameter, the following entries will open on the right side:
- EnableSuperfetch;
- EnableBootTrace (can only be on Windows 7).
Double-click on each of the listed parameters and change their value to 0. Then exit the Registry Editor and restart the computer.

Turn off diagnostic and usage data (Windows 10)
Windows 10 has a built-in feature that collects and sends diagnostic data from the system to Microsoft. This is statistical data regarding Windows usage that is provided to help developers fix bugs and improve system quality. Many people have problems with this feature, claiming that it reduces user privacy. But, besides this problem, there are no less important technical ones, namely... disk loading.
After updating KB3201845, it turns out that the diagnostic and information collection function starts additional services related to Windows performance monitoring. In short, this update causes the so-called Windows Performance Recorder (WPR) service to launch, which collects tons of information about the computer. The action of this service leads to the fact that the hard drive is working all the time, and in the Task Manager we see 100% disk load. What to do about it?
First, you need to make sure that it is Windows Performance Recorder that is causing excessive disk load. To do this, right-click on Start and select “Command Prompt (Administrator)” from the drop-down menu.

In the Command Prompt window, enter the following command and confirm its execution by pressing Enter:
WPR-cancel
This command can delay the WPR (Windows Performance Recorder) service. If the message “There are no trace profiles running” appears on the screen, this means that WPR did not work, i.e. it was not the cause of the problem and the solution should be looked for elsewhere.

However, if a message appeared confirming the delay of this feature and the disk load decreased after a while, then this means that WPR was actually running in the background and started every time the system was rebooted.
The solution is to limit data collection in Windows 10.
To do this, go through the Start button to Settings and select the “Privacy” section.

In the side menu, scroll down to Reviews and Diagnostics and find the Diagnostics and Usage Data option on the right. Set the Send device information to Microsoft field to Basic Information.

Now this service will be automatically disabled and will not start along with the operating system. Now the load on the disk should decrease to a lower level.
Conflict between Skype and Chrome programs in Windows 10
The next reason for high disk load is not only typical for older computers, but can also occur on new laptops with Windows 10. It turns out that the cause may be a combination of installed programs - Skype and Chrome.

We have already looked at how to solve high disk load problems by disabling unnecessary services. But it turns out that these solutions do not always help, since the problem can arise through the action of a certain set of reasons.
It turns out that users who purchased a new laptop with Windows 10 encounter 100% disk load. The system starts up and works quickly, but after about 5 minutes the computer slows down significantly. The problem occurs when installing two programs on a laptop with Windows 10 - Chrome and Skype. This situation is described on the official Microsoft forum and we have prepared a solution for you based on its reports.
These programs somehow conflict with each other, which leads to high disk load. To avoid this, you need to make changes to your Chrome and Skype settings.
Chrome
In the Chrome browser, you need to go to advanced settings. To do this, in the upper right corner of the window, click on the “Settings and Control” button (indicated by three vertical dots). Then in the drop-down menu go to the “Settings” item and at the very bottom we find the link “Show additional settings...”.

In the expanded list we find the “Personal Data” section. Here we find the item “Use hints to speed up page loading”.

You need to uncheck this item, since in some cases this option can cause problems with disk loading.
Skype
Now you need to make changes to Skype. First, you need to completely close it so that it does not work even in the background. We close it using the tray icon or by deleting the Skype.exe process itself in the Task Manager.
Now go to the folder in which Skype is installed. If you haven't changed anything, then the default path is:
C:\Program Files (x86)\Skype\Phone.
Here we find the Skype.exe file. Right-click on it and select “Properties”. Go to the Security tab and click on the "Edit" button.

Note that in the window that opens you can edit the access rights of individual groups. Select the “All application packages” group in the list. You can now manage permissions for this group using the bottom position.

In the “Allow” capital, check the “Write” field to allow the “ALL APPLICATION PACKAGES” group to record data. Save changes to OK. Now you can turn on Skype again and use the Chrome browser, the download to disk should be significantly reduced.
Updated: 12/22/2019 Published: September 24, 2016
Description
- The computer is running slowly, and in the task manager the disk is constantly loaded at 100%.
- After booting the computer, the computer slows down for several minutes, and the disk load is 100%.
The problem occurs on laptops, all-in-one PCs, and desktop PCs. The type of media also does not matter - a high load can be on HDD or SSD.
Cause
- Active use of the paging file by the system.
- A process that actively uses the computer's disk system.
- Severe fragmentation.
- Logical or physical errors of the media.
- Viruses.
Solution
1. Disable the swap file
Most modern computers use a large amount of RAM, so there is no need for a page file.
To disable it in Windows 10 / 8.1, right-click on Start:
And choose System:
In Windows 7 and below, open Conductor- right-click on Computer and choose Properties.
Now in the left part of the window that opens, click on Advanced System Settings:
In the window that appears, on the tab Additionally find the section Performance and press the button Options:
Go to the tab Additionally:
And press Change In chapter Virtual memory:
Now uncheck Automatically select paging file size and place a pointer to the disk with the swap file:
Just below we set the choice on the item No swap file and press Set:
The system will issue a warning about the inability to create debugging information if a critical error occurs. We agree by clicking Yes.
Then close all windows by clicking OK and restart the computer.
If the system continues to freeze, and the disk is used at 100%, follow the instructions below.
2. If the disk is loaded by the system process
You cannot remove a task from the system process, but what if it creates a large load?
Typically this occurs due to Windows services:
- Snupchat;
- Superfetch;
- Windows Search;
- Windows Update;
- IPsec Policy Agent;
- Windows Update;
- Diagnostic Policy Service;
- Client for tracking changed connections;
- KtmRm for distributed transaction coordinator.
We first try to disable them using one of the Services console or using the command net stop<имя службы> . If this gives a temporary effect, disable the autostart of these services.
Also, in rare cases, the Windows Firewall may be the problem. Let's try to turn it off.
3. Check the physical condition of the media
Physical failure of the disk is also possible and affects the response speed of the media.
Process Explorer:
For more detailed information, you can use the Process Explorer program. By default, it does not show the load on the disk system, so open the column editing window:
Go to the tab Process Disk and check the boxes for disk reading and writing:
5. Optimize the media
When using a HDD (not an SSD), data fragmentation (their physical scattering across the surface of the disk) plays a big role in performance. For optimal performance, defragmentation is necessary. For an SSD drive, you can perform optimization - filling the free space with zero data. Defraggler can easily handle these two tasks.
Frequent defragmentation spoils the disk - the HDD is physically depreciated, and the SSD loses read/write resource. Frankly speaking, it will not help much for the latter, since data fragmentation does not reduce its performance. It is worth defragmenting sparingly when necessary.
6. Do a logical disk check
Logic errors can also cause problems.
The check is performed from the command line with the command:
* where c: is the letter of the section to check.
7. Perform an anti-virus scan
It is best to perform not only a full scan with the installed antivirus, but also additionally scan the system with a healing utility, for example, CureIt.
The installed antivirus itself may also be the cause of the problem - we try to update it, temporarily disable it, or remove it.
8. Disable hibernation mode
If the computer loads the disk system for some time after waking it from sleep mode, try disabling hibernation - to do this, launch the command line as an administrator and enter:
We reboot the computer and test the PC for some time. Later, hibernation mode can be enabled again:
9. Removing disk utilities
Slow performance may be due to the presence of disk management software on the system, such as Intel Rapid Storage Technology. Removing this software component may resolve the problem.
Users of the Windows 10 operating system increasingly began to notice that after updates the disk is loaded to the maximum. And even after the installation of all applications is completed, the workload does not subside. Loading disk 100 Windows 10 - there is a solution to this problem, and more than one.
Possible reasons
There are several common reasons for a disk being 100% loaded in Windows 10:
- There is a looping process in the OS.
- The process of backing up data to third-party media or to the cloud is in progress.
- Disks are fragmented.
- There are bad sectors on the disk.
- Third-party applications and programs are running that heavily load the system.
- The load comes from such service systems as Windows Search and Superfetch.
- Incorrect operation of drivers.
- System processes svchost and system.
How to check what exactly is loading the disk
To check what exactly is loading the disk so much, you need to do the following:

The column will display actions that heavily load the disk. As a rule, disabling them directly in the dispatcher will help reduce the load.
Solutions to the problem
There are several methods to fix the problem. It happens that the load is asymptomatic, that is, all processes are suspended, not a single application is running, but the load is present. In this case, it is recommended to try all methods, they will help identify the main cause of the problem.
Disable Windows Search
This service helps you search for files on your PC. But it happens that it is she who loads the disk so much. To disable it you need to do this:
- Enter and execute the command net.exe stop“Windows search”.
This will help disable the service for a while. It will work again after rebooting the device. If it is this that loads the disk, you can turn it off completely. To do this you need to click VIN+R and enter the command services.msc. Find Windows Search in Services. Double click on it and in the parameter "Startup type" put "Disabled".
Deactivating Message Signaled Interrupt mode
To solve the problem, you need to reproduce the following steps:
- Open Device Manager.
- Expand the list of controllers. Double click on AHCI.
- Go to the driver tab and view the information.
- Open tab "InformationI» and see the way. Copy it into notepad.
- Open utility "Run" using a key combination VIN+R. Enter the regedit command.
- In the registry, find HKEYLOCALMACHINE/System/CurrentControlSet/Enum/PCI/“copied path”.
- Expand line DeviceParameters/InterruptManagement/MessageSignaledInterruptProperties.
- Double click on « MSISupported» and adjust the value to zero. Save changes.
To disable hints, you need to follow the instructions:

Disable Windows updates
You can disable updates in the following way:

Fixing incorrect operation of AHCI drivers
If the driver does not work correctly, it needs to be updated. You can do it this way:
- Go to the official website of the computer motherboard manufacturer. Go to section "DriverA» .
- Find the SATA(RAID) type driver and download the file.
- In some cases, the downloaded document will be an installer and you just need to run it.
- But sometimes these are just drivers and you need to install them in a different way. To do this, you need to open the archive and move all the documents to another folder with a convenient path.
- Go to device manager and right-click on "Standard SATA controller". Select item "Update drivers".
- Select search for drivers on the device. And in the window that opens, specify the path to the folder with them.
- Wait for the update and reboot the system.
Command line
Windows has a service that collects performance data and sends it to Microsoft. To disable it you need to do the following:
- Run command prompt as administrator.
- Enter the wpr –cancel command and execute it.
It is worth noting that the service will resume operation after a system reboot.
Disk properties
Certain disk properties can also overload systems. To fix the problem you need to do this:

Telemetry
To reduce the telemetry level you will need to do the following:

Deactivating the diagnostic service
To disable this service you must follow the instructions:
- Click on menu "Start" by clicking on the right mouse button.
- Go to "Computer Management".
- Go to "Services and Applications".
- Then go to the tab "Services".
- Select from the list "Diagnostic Service Node" And "Diagnostic system unit".
- Double-click on each line and select "Load Type" How "Disabled".
- Save changes.
Disable SuperFetch
This service is designed to improve system performance. But in some cases, its operation only overloads the device. To disable it, you need to do the following:
- Open the Command Prompt utility as administrator.
- Enter the command net.exe stop superfetch.
- Check in the dispatcher to see if the load has changed.
- Then start the process of checking the hard drive for damage with the command chkdsk.exe / f / r.
- As soon as the command completes, the device must be rebooted.
If the load does not decrease after shutting down the operating system process, then it is likely that the service is not causing the problem.
High Performance Mode
If the laptop uses a standard power mode, then you need to replace it with another one. To do this you need to click on the keys VIN+X. Choose "Power Management" and change it to "High Performance Mode".
The problem of disk loading at 100 percent on Windows 10 has several solutions. Instructions must be followed carefully. Also, some users overload their hard drive without realizing it. As a rule, it is enough to disable all third-party applications during updates and when they are finished, the load will go down. But in some cases, the disk becomes overloaded for other reasons that cannot be precisely determined. In this case, you need to try all methods.
VIDEO


